


Security Assertion Markup Language (SAML) is an XML-based standard for exchanging authentication and authorization data between parties, in particular, between an identity provider (IDP) and a service provider (SP). In this article, we will walk through how to set up a SnowMirror SP integration with Authentik SAML IDP.
Overview
The SAML flow allows you to authenticate a user's identity and obtain a SAML response that can be used to interact with Authentik SAML IDP on their behalf. Here are the steps involved in setting up a SnowMirror integration with Authentik SAML IDP:
Create SAML Property Mappings
Set up a SAML Provider in Authentik
Create an application in Authentik
Create Groups and assign users in Authentik
Configure the SnowMirror Security Real
We'll go through each of these steps in detail below.
Step 1: Create SAML Property Mappings
Login to your Authentik admin interface and
Browse to the Customisation > Property Mappings section from the left sidebar
Click the Create button.
Select SAML Property Mapping and then click Next.
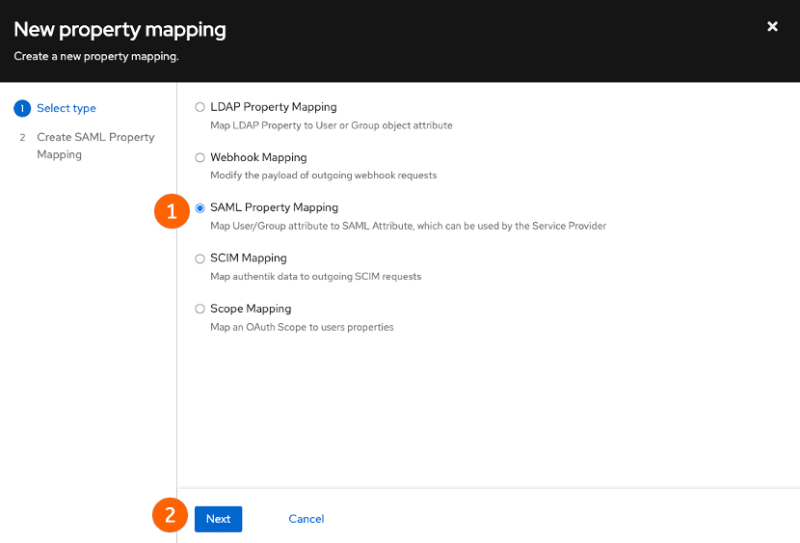
Then use the following values to create the property and click Finish.
| Parameter | Value |
| Name | SnowMirror SAML Mapping: Groups |
| SAML Attribute Name | groups |
| Expression | for group in request.user.ak_groups.all(): yield group.name |

Step 2: Set up a SAML Provider in Authentik
The first step is to create a Authentik Provider. To do this, follow these steps:
Browse to the Applications > Providers section from the left sidebar
Click the Create button.

Select "SAML Provider" and Click on "Next"

Then use the following values to create the provider and click Finish.
| Parameter | Value |
| Name | SnowMirror |
| Authorization flow | default-provider-authorization-implicit-consent |
| ACS URL | https://snowmirror.company/saml/SSO |
| Issuer | SnowMirror |
| Service Provider Binding | Post |
| Property Mapping | SnowMirror SAML Mapping: Groups, |
authentik Default SAML Mapping: User ID |

| ⚠️ WARNING |
| The ACS URL is an example URLs only and will not work in your setup. You need to replace snowmirror.company with the FQDN of your SnowMirror server |
Step 3: Create an application in Authentik
- Click the Create button under the "Assigned to application" heading that's now showing for the SnowMirror provider in Authentik.

- Populate the form with the information pictured below and then click the Create button:
| Parameter | Value |
| Name | SnowMirror |
| slug | snowmirror |
| Provider | SnowMirror |

4. Create Groups and assign users in Authentik
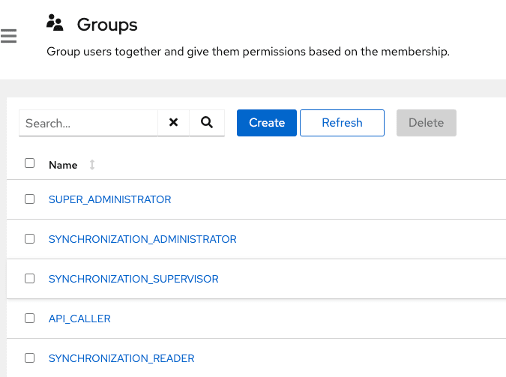
Browse to the Directory > Groups section from the left sidebar
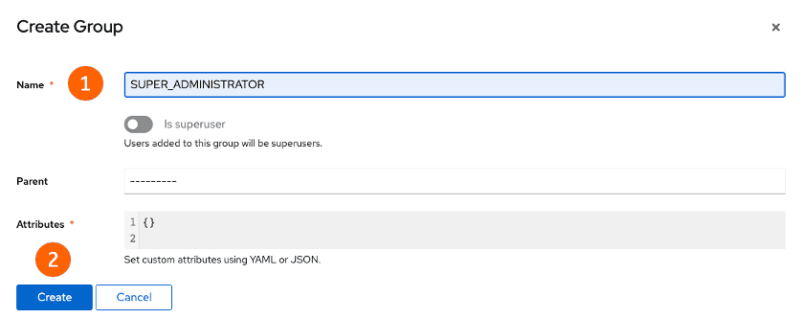
Click the Create button.
Enter SUPER_ADMINISTRATOR and click Create
Setup additional SnowMirror Groups if required
Select the Group for which you would like to add users to and select Users from the top tab bar.
Click on Add Existing User

Select the user and click Add
Step 5: Configure the SnowMirror Security Real
Login to your SnowMirror admin interface and
Browse to the Settings > User Management section from the top menu
Click the Configure Security Realm button Then use the following values to create the Security Realm and click Save.
| Parameter | Value |
| Security Realm | SSO |
| Entity Id | SnowMirror |
| IdP Metadata | copy the Metadata from the Authentik provider created in Step 2 |
| Internal Realm | Enabled |

Click logout and login to your SnowMirror using your SnowMirror FQDN.